Solving the Problem
Tinting your vehicles lights is a quick process that can be easily done at home on most vehicles, often with a pre-cut kit. While this is an easy process, there are some common issues that DIY tinters and professionals (who have not used LightWrap) tend to encounter. We have created this resource in order to help diagnose problems and offer solutions moving forward.
This list is not a completely exhaustive list. If you have installation issues, please contact our customer service team as soon as possible.
Remember to take pictures!
Fingers: Over-Stretching
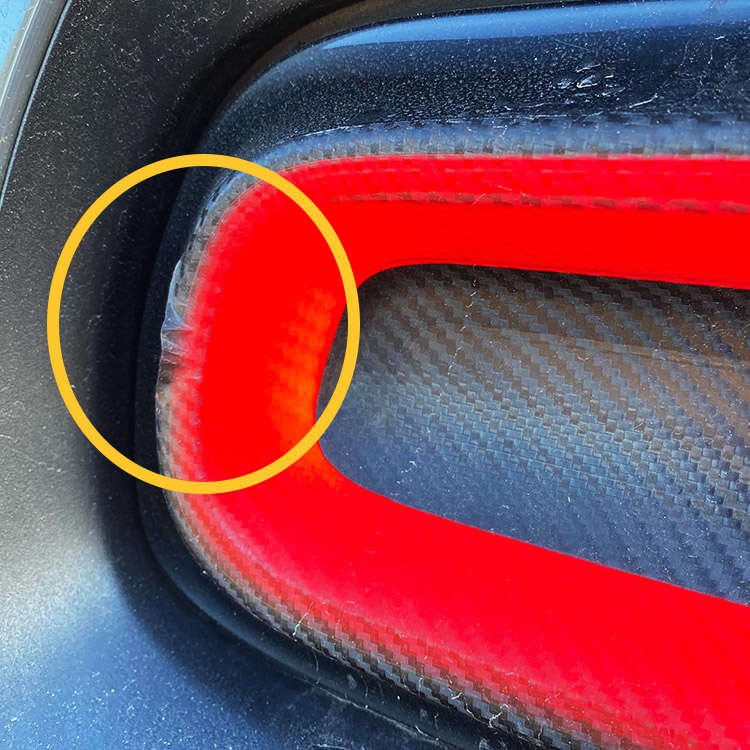
The Problem: The two most common accidents that DIY installers (and even some professionals) make is over-stretching and/or a lack of post-heating. Both of these accidents cause "fingers" in the vinyl. (Find examples here, here, and here.) Once you have over-stretched your vinyl the only solution is to remove and try again with a new sheet of vinyl.
How To Prevent It: Before you begin the installation process, make sure you have watched at least one installation video so that you understand the entire process of installation including best practices and industry standard methods and techniques.
Check Your Position
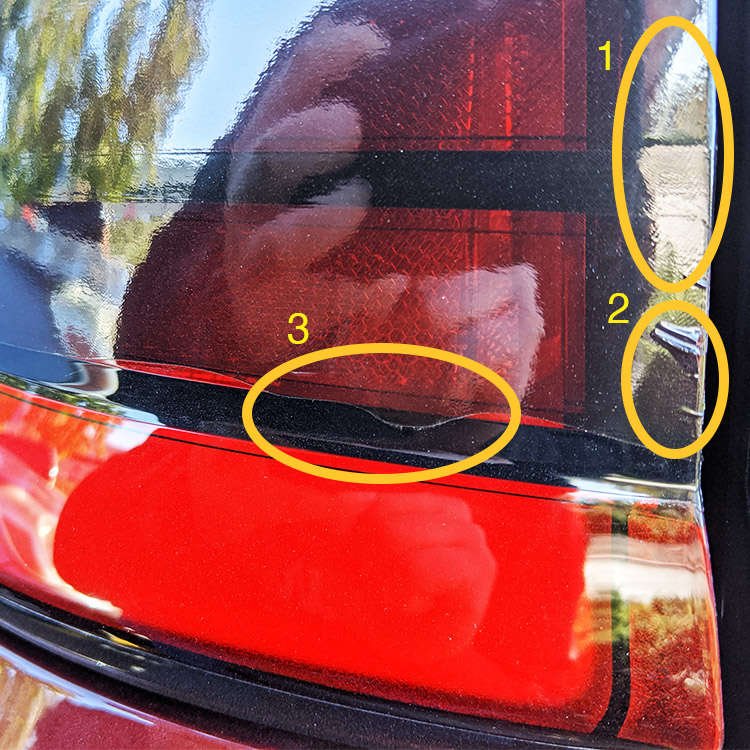
The Problem: Here, the vinyl was sealed down in the incorrect spot and then (1) over-heated and (2 & 3) over-stretched.
How To Prevent It: Before you squeegee down the vinyl, ensure that the tint is centered and will cover the entire surface. Correct the placement issues and use the repositionability of the LightWrap to your advantage. Once the vinyl is in the correct spot you're ready to squeegee down. Some stretch is always necessary when wrapping, but if you see the air channels shifting and changing (as you do in this picture) then you've over stretched.
Wrapping Concave
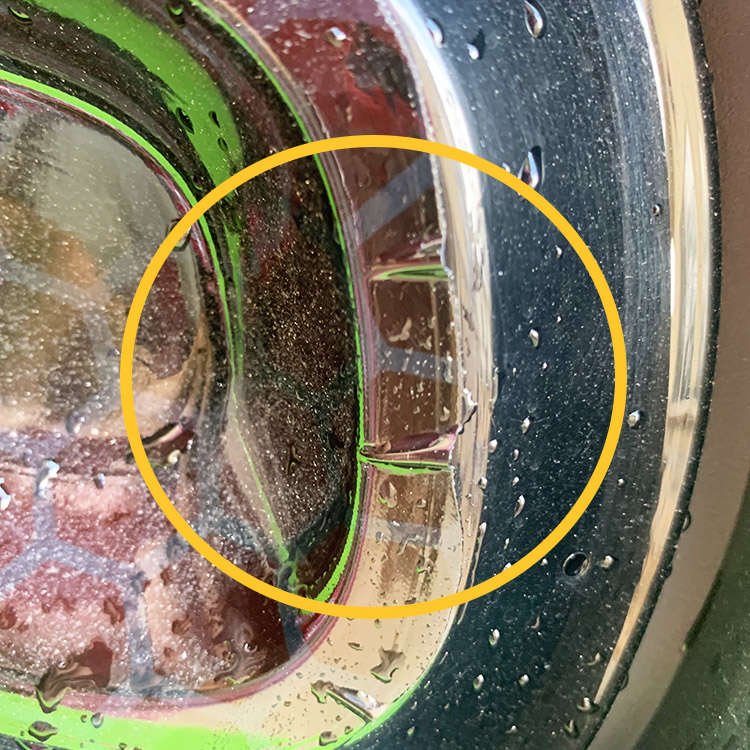
The Problem: Wrapping concave lights can be challenging, especially for the DIY wrapper. Many cars on the market have concave lights, which is why we cannot stress enough: PLEASE watch the installation videos before you begin your project.
How To Prevent: When wrapping in a concave spot on your vehicle, remember that post heating is VERY important for these spots. Also, be careful to not over stretch when installing in the concave sections. Take your time, press everything down well, reposition if necessary, and make sure everything is post-heated so that air is removed and bubbling doesn't occur within the first few days of installation.
The Cut
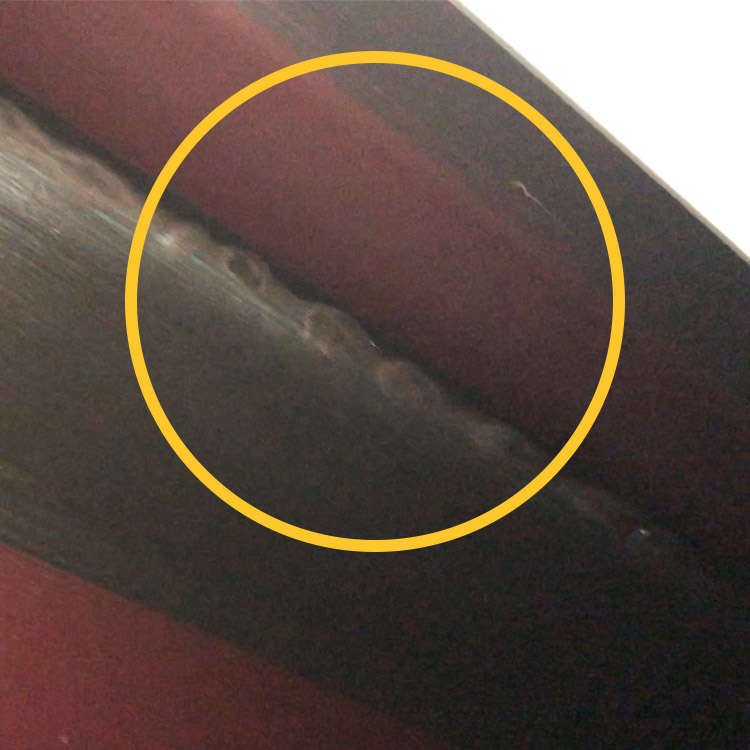
The Problem: Make sure you cut your tint in the correct spot. Wrap all the way around the "plateau", don't cut on the top. Be mindful of your cuts. Over stretching after a bad cut will cause fingers (see above) and there is unfortunately no way to save the tint at this point.
How To Prevent: Use YouTube to your advantage and watch some installation videos. Pay attention to where the installers cut the film. Remember that you're LightWrapping and you need to fully wrap and then cut at the bottom of the "plateaus". The full wrap gives a finished professional look and helps to hid the end seam. And don't forget to post-heat.
Bubbles
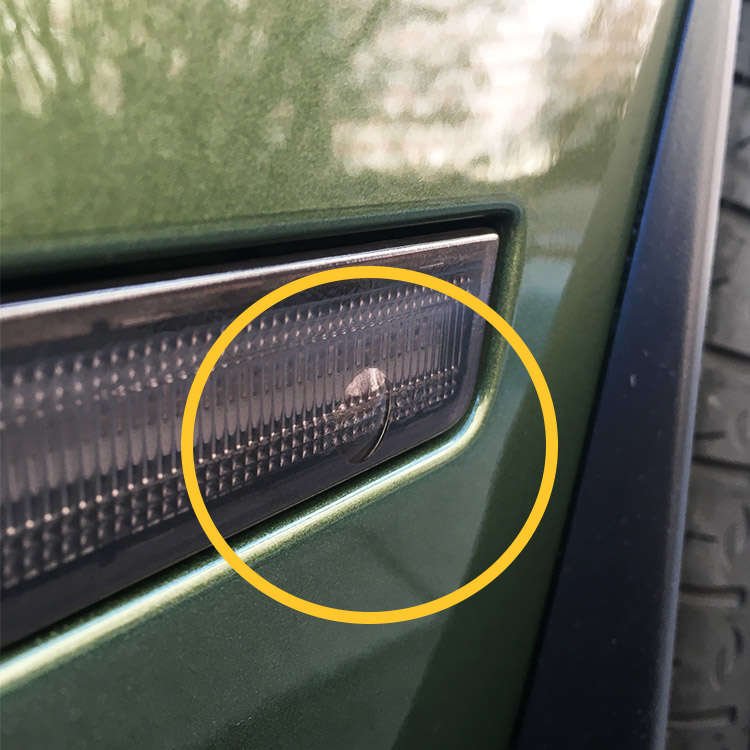
The Problem: Air is trapped between the light and the tint. The more the light is used, the hotter the bubble air gets, the hot hair expands the bubble. Now you have a huge bubble. If the bubble is very small (much smaller than the one in this picture) you can try to use a tiny pin and puncture the bubble, press the air out, then press the tint down while heating... but it is unlikely that will work for long. If you have large or extensive bubbling you should remove your tint and re-attempt installation.
How To Prevent: Make sure you get ALL of the bubbles out when you install. Even before you post-heat PRESS DOWN EVERYWHERE. Squeegee everything well. Use light heat to warm the air that may be trapped. If an area expands or bubbles you know you have air there. Get rid of all of the air between the tint and the light surface. Finally, post-heat.
Warped Air Channels: Over-Stretching
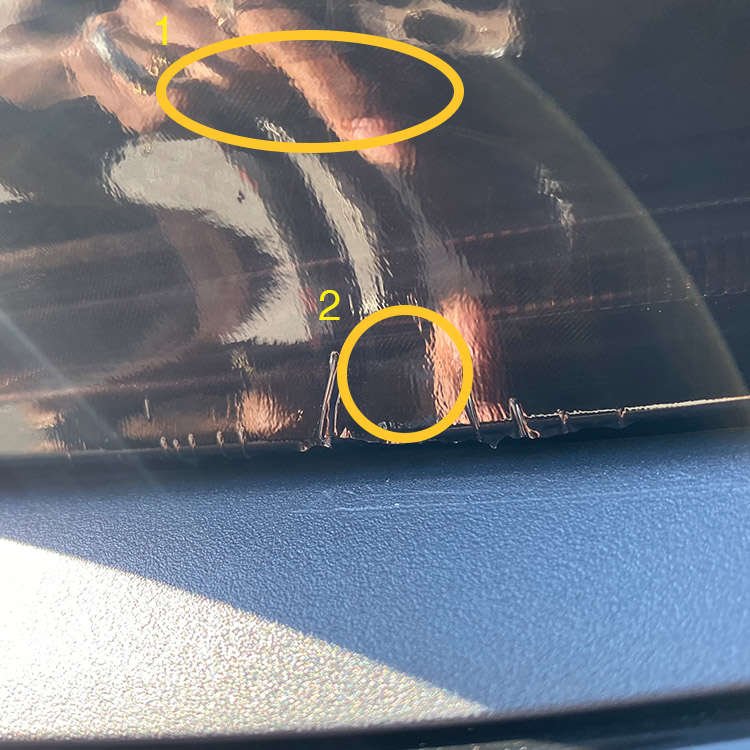
The Problem: You can see the normal air channels (1) are relatively straight. Once the vinyl has been overstretched the air channels look skewed (2) in the direction of the stretch.
How To Prevent: As mentioned before, prior to beginning the installation process, make sure you have watched at least one installation video so that you understand the entire process of installation including best practices and industry standard methods and techniques.
Use the Vinyl Memory to Your Advantage
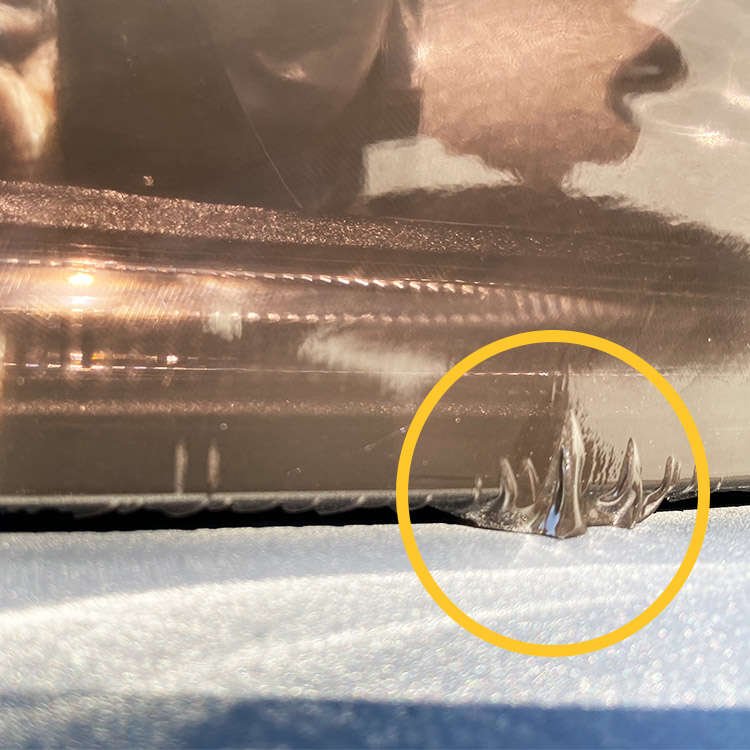
The Problem: On this Charger headlight, there was not enough pre-stretch done horizontally. Because the light is a compound curve, the only way to compensate for the lack of stretch was to pull hard vertically, resulting in this area of highly focused tension (over-stretch fingers).
How To Prevent: Use the LightWraps memory effect to your advantage. If you have a horizontal compound curve, work with the compound curve. Carefully stretch the vinyl in the direction of the pull of the compound curve so that you do not need to stretch it in the other direction to compensate after.
Feed the Vinyl
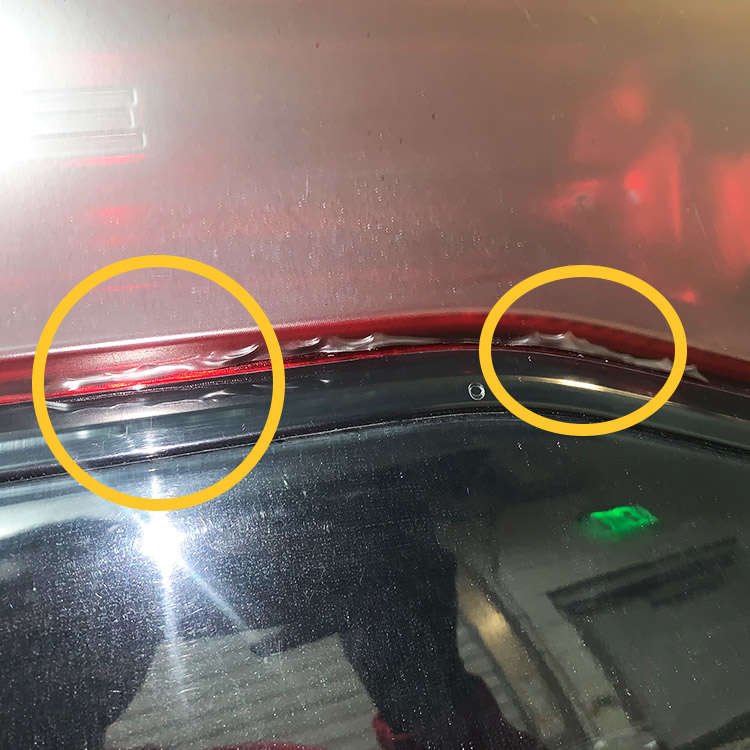
The Problem: Rather than feeding the tint, the vinyl was stretched into place. This over-stretch caused the vinyl to try to retreat, and we see that fingers are present.
How To Prevent: Apply painters tape to the body panels next to the lights where you will be working. This protects the body of your car so that when you use your squeegee tool to feed the vinyl into place, rather than stretching it into place.
Contaminates
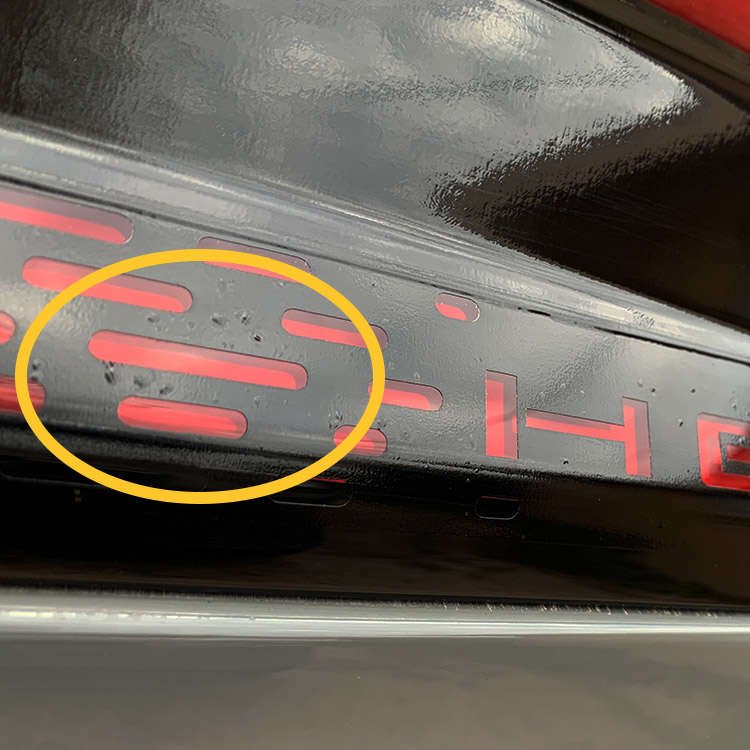
The Problem: Small bumps and bubbles are present all over the vinyl decal or tint. Debris has been left behind and was not removed prior to installation.
How To Prevent: Unless your car is brand new off of the lot, there are probably surface contaminates. Sometimes there are things on our car that we cannot even see... until we've applied the vinyl. The best way to prevent this and to get ahead of possible contaminates is to clay bar the installation surface before you start the application process.
PPF Issues
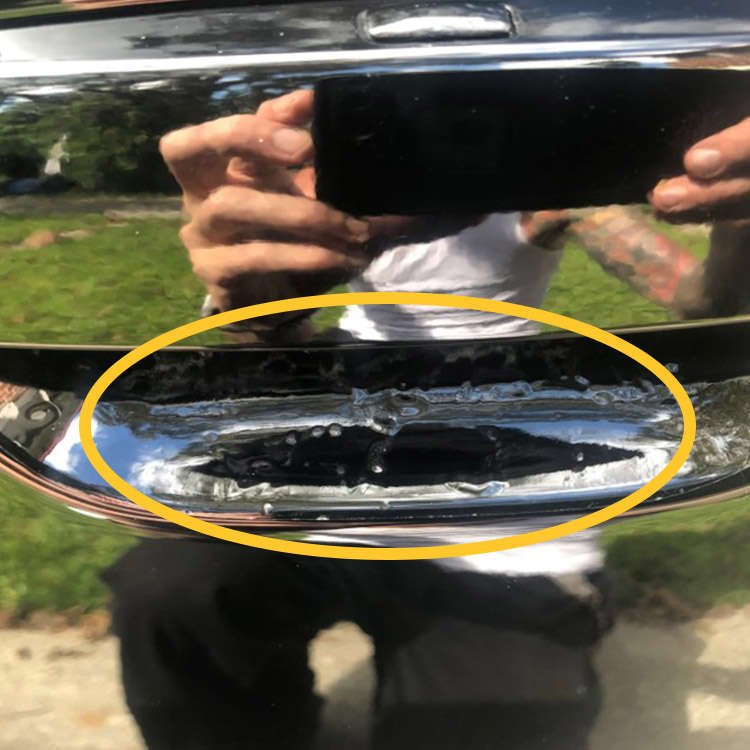
The Problem: Bubbles are left on the surface after the paint protection film has been installed. Paint protection film does not stretch like vinyl does and the installation methods are different.
How To Prevent: When you're Installing PPF you want to use an obscene amount of installation fluid. Spray your surface down. Keep going. Once you've thoroughly moistened the work surface, apply your PPF, then continue to squeegee the PPF until ALL of the bubbles and visible moisture underneath is removed. If you still have bubbles, you're not done. And remember that PPF is NOT a vinyl, so do not heat PPF. As with any new project, we suggest watching a PPF installation video before you get started.
Make A Seam
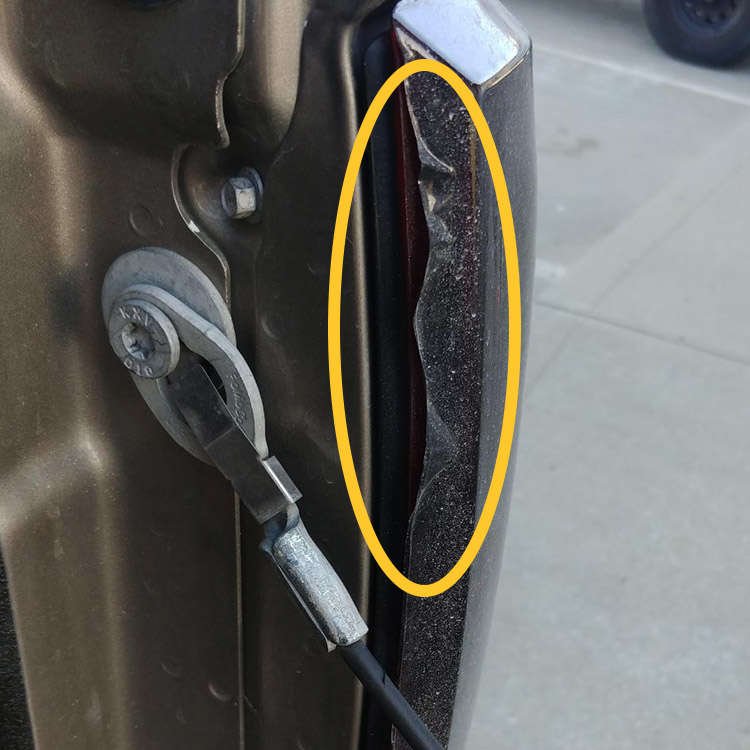
The Problem: Rather than cutting a seam, the tint was stretched around an extreme curve. This resulted in over-stretch fingers and peeling.
How To Prevent: Rather than stretching the vinyl over an extreme curve, find a spot to cut a small hidden seam. In this example, rather than wrapping the vinyl around the corner of the truck light, a seam could be cut at the top. Next, the vinyl could be wrapped around the corner as if wrapping paper around a present. The seam would be barely visible when the truck bed is down and totally hidden when the truck bed is closed.
Hot Stuff
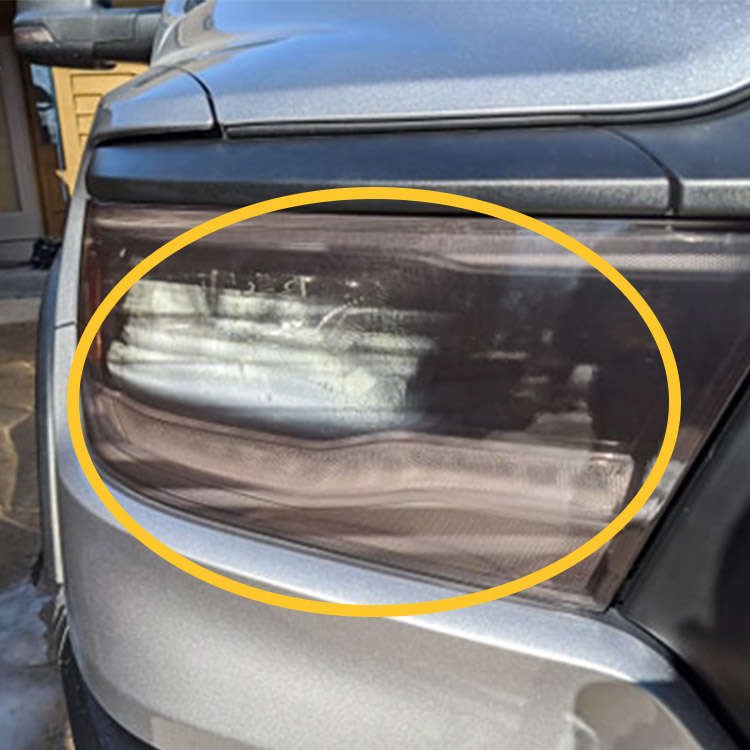
The Problem: Your tint is foggy, distorted, melted, hazy, or otherwise looks burned.
How To Prevent: If your lights (we're primarily talking about headlights here) get to 200 degrees when they are on then they are too hot for LightWrap. This is uncommon, however some car models (Yukons) and some lights (halogen) are known to cause issues. A good rule of thumb to go by is: if your lights are housed behind glass rather than plastic then your lights are too hot for tint.
Have issues with your vinyl installation?
Comment below or contact us for assistance.


